
Appearance
Excel Upload
Use this session to upload invoices in Excel format.
This session will only be accessible if "Excel Upload" is checked in Parameters.
Create Template Screen
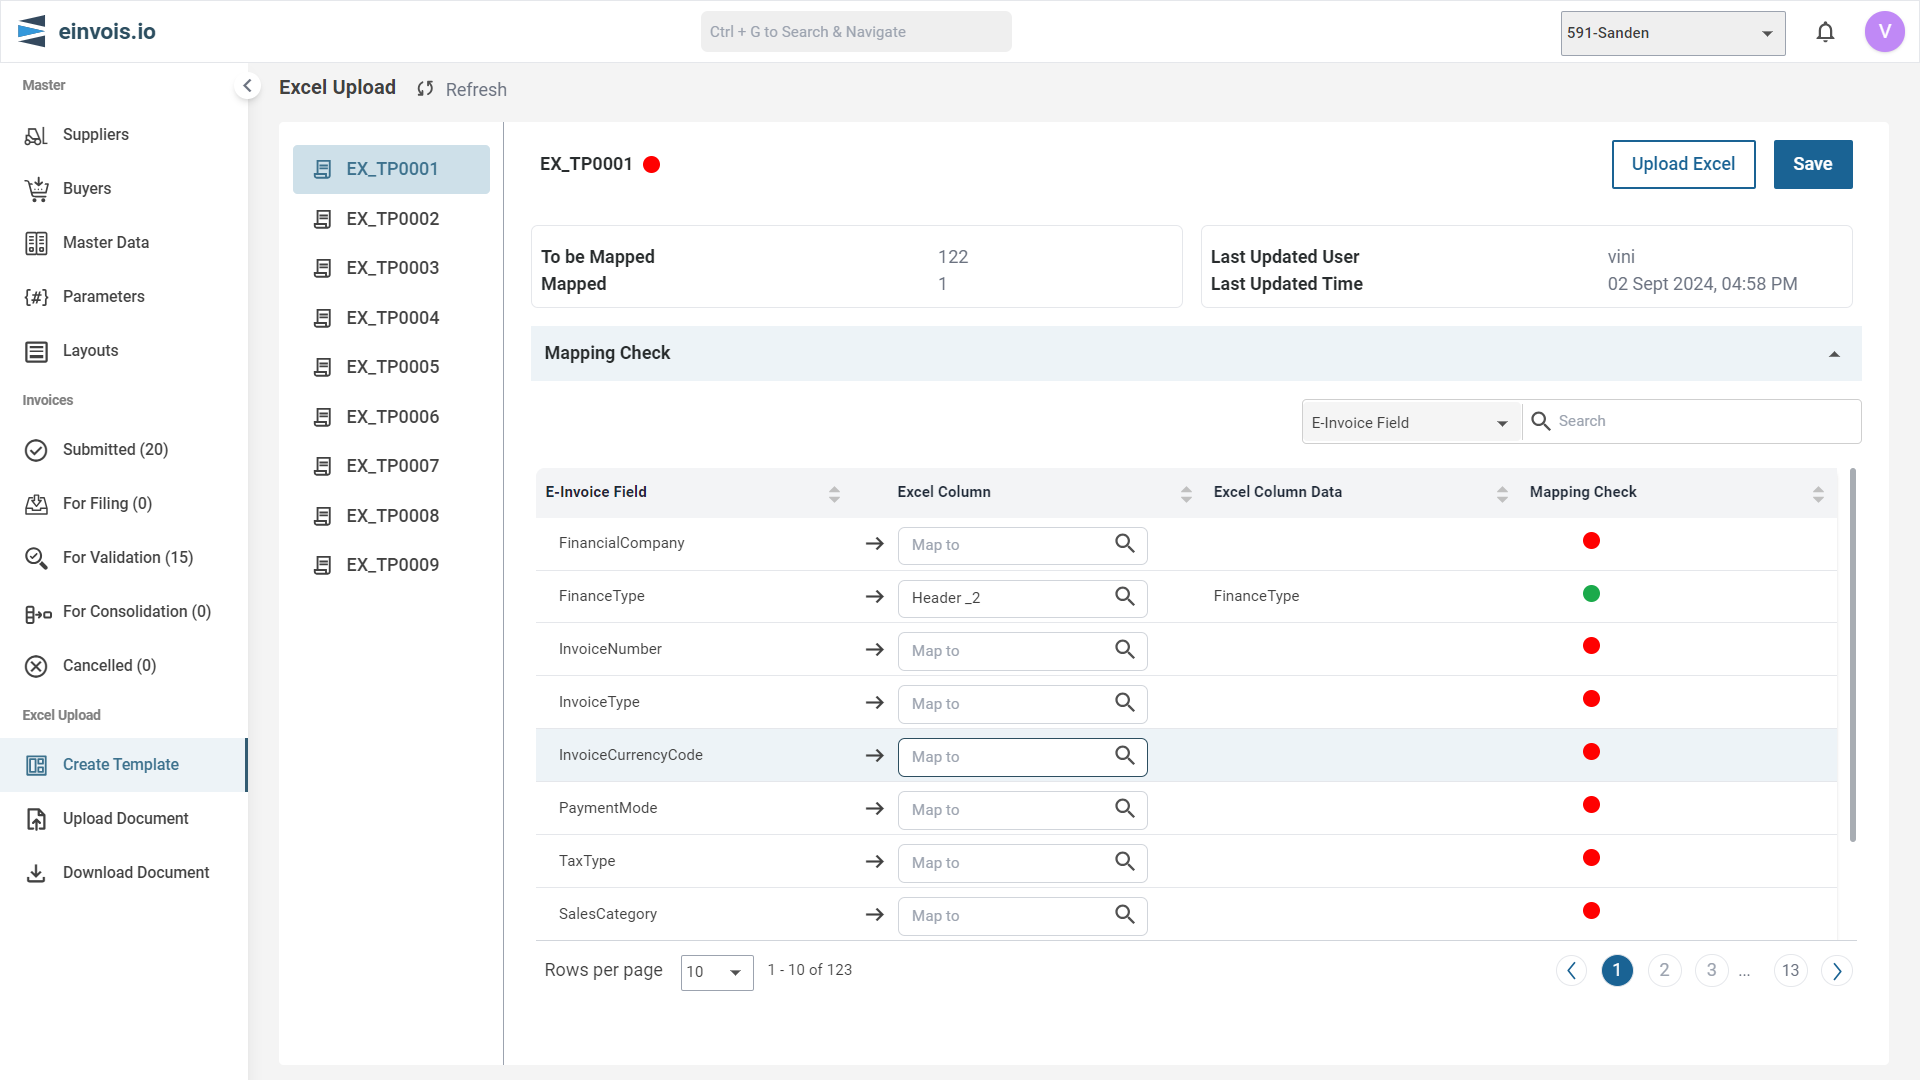
Upload Excel
Rules for Uploading Invoices in Excel Format
- The 1st line should be the header, naming each field.
- The 2nd line should provide sample data for these fields.
Step:1
Click "Upload Excel" to upload your Excel file.
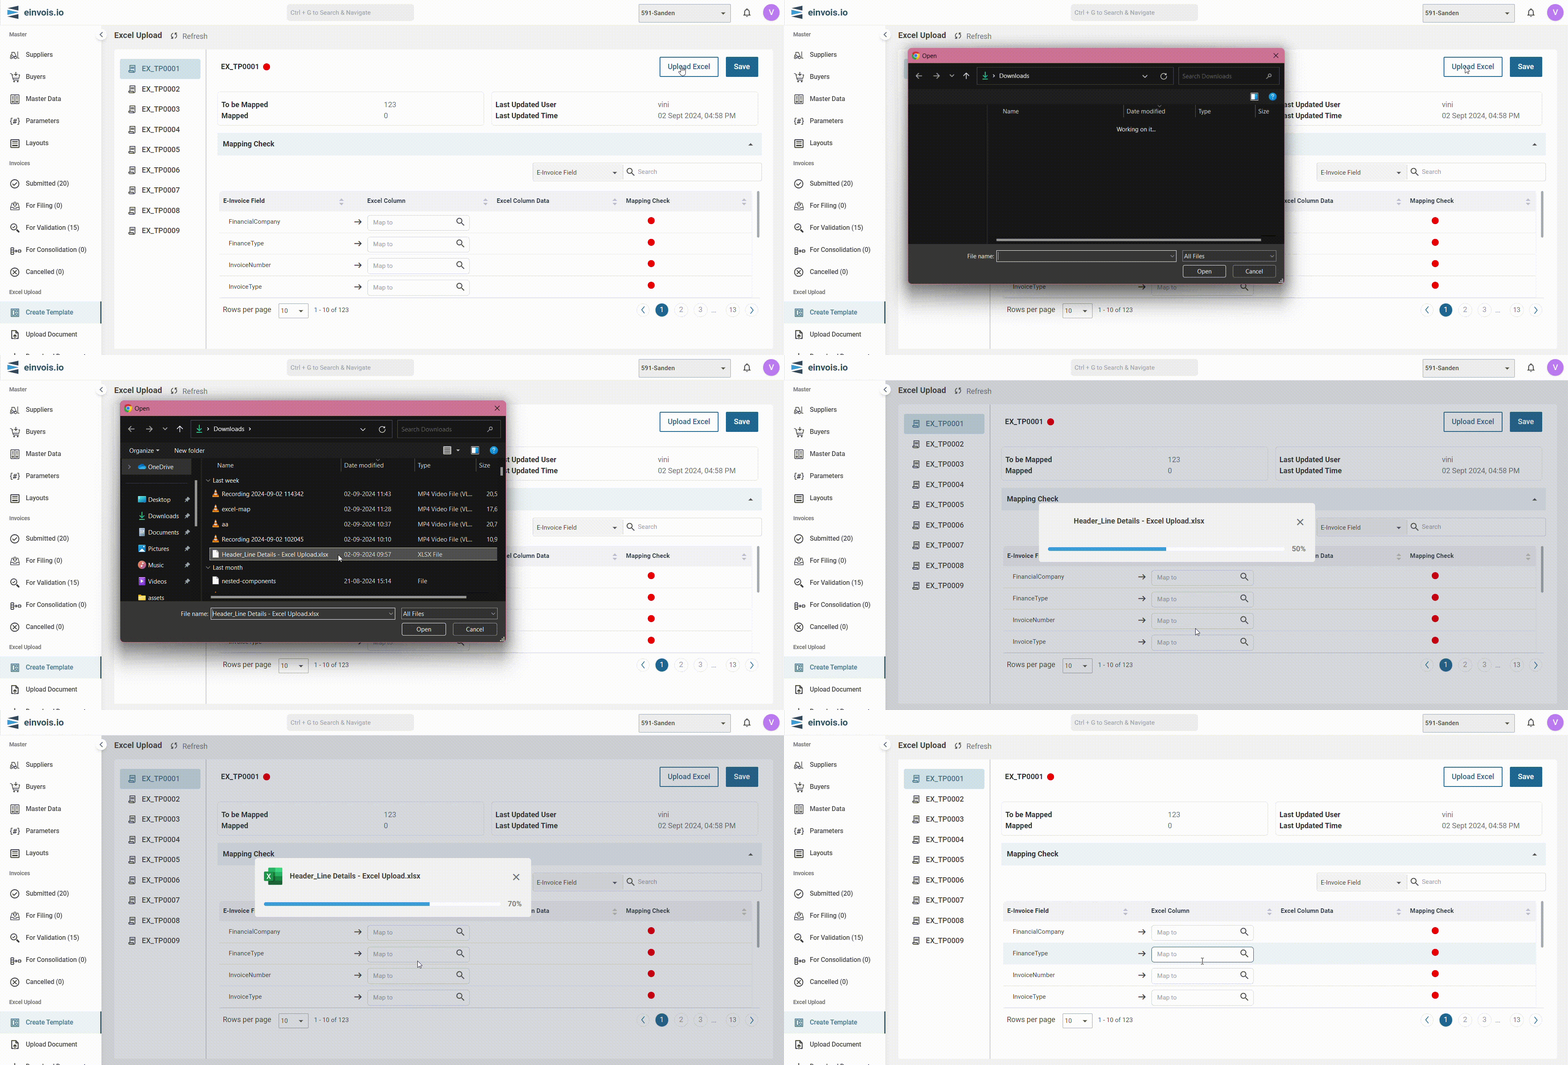
Step:2
After successfully uploading the file, manually map the fields from your Excel file to the corresponding fields in the system.
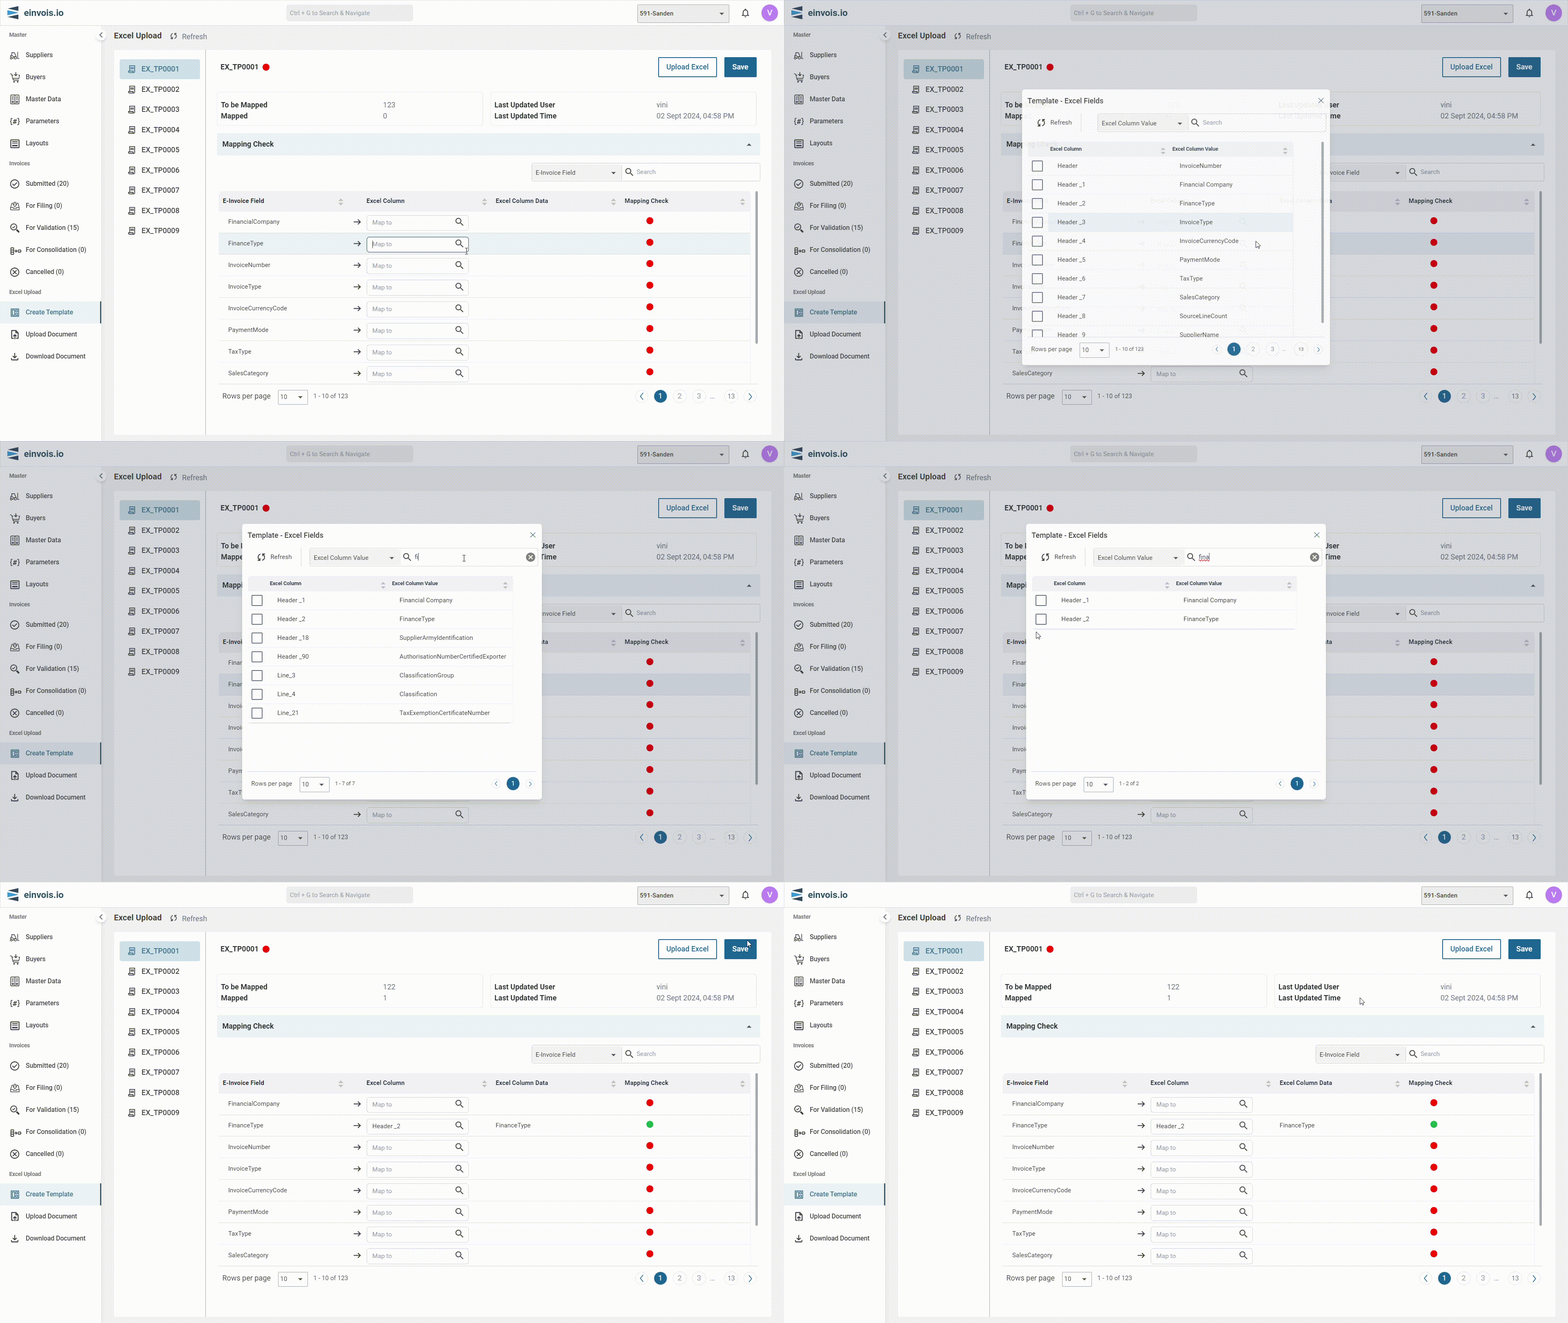
Step:3
Once mapping is complete, click Save to finalize the mapping configuration.
List of Excel Files:
On the left-hand side, there is a list of Excel templates (e.g., EX_TP0001, EX_TP0002, etc.). These templates represent different sets of data that need to be uploaded and mapped.
Mapping Check Section:
It shows the status of mapping between the Excel fields and the system's E-Invoice fields.
E-Invoice Field:
This column lists the fields required by the E-Invoice system (e.g., FinancialCompany, FinanceType, etc.).
Excel Column:
This column displays the corresponding fields from the uploaded Excel file that have been mapped to the E-Invoice fields.
Excel Column Data:
This column provides a sample data from the Excel file.
Mapping Check Indicators:
Green dots indicate that the mapping is correctly done.
The system validates the mapping to ensure that all necessary fields are correctly linked.
Upload Document
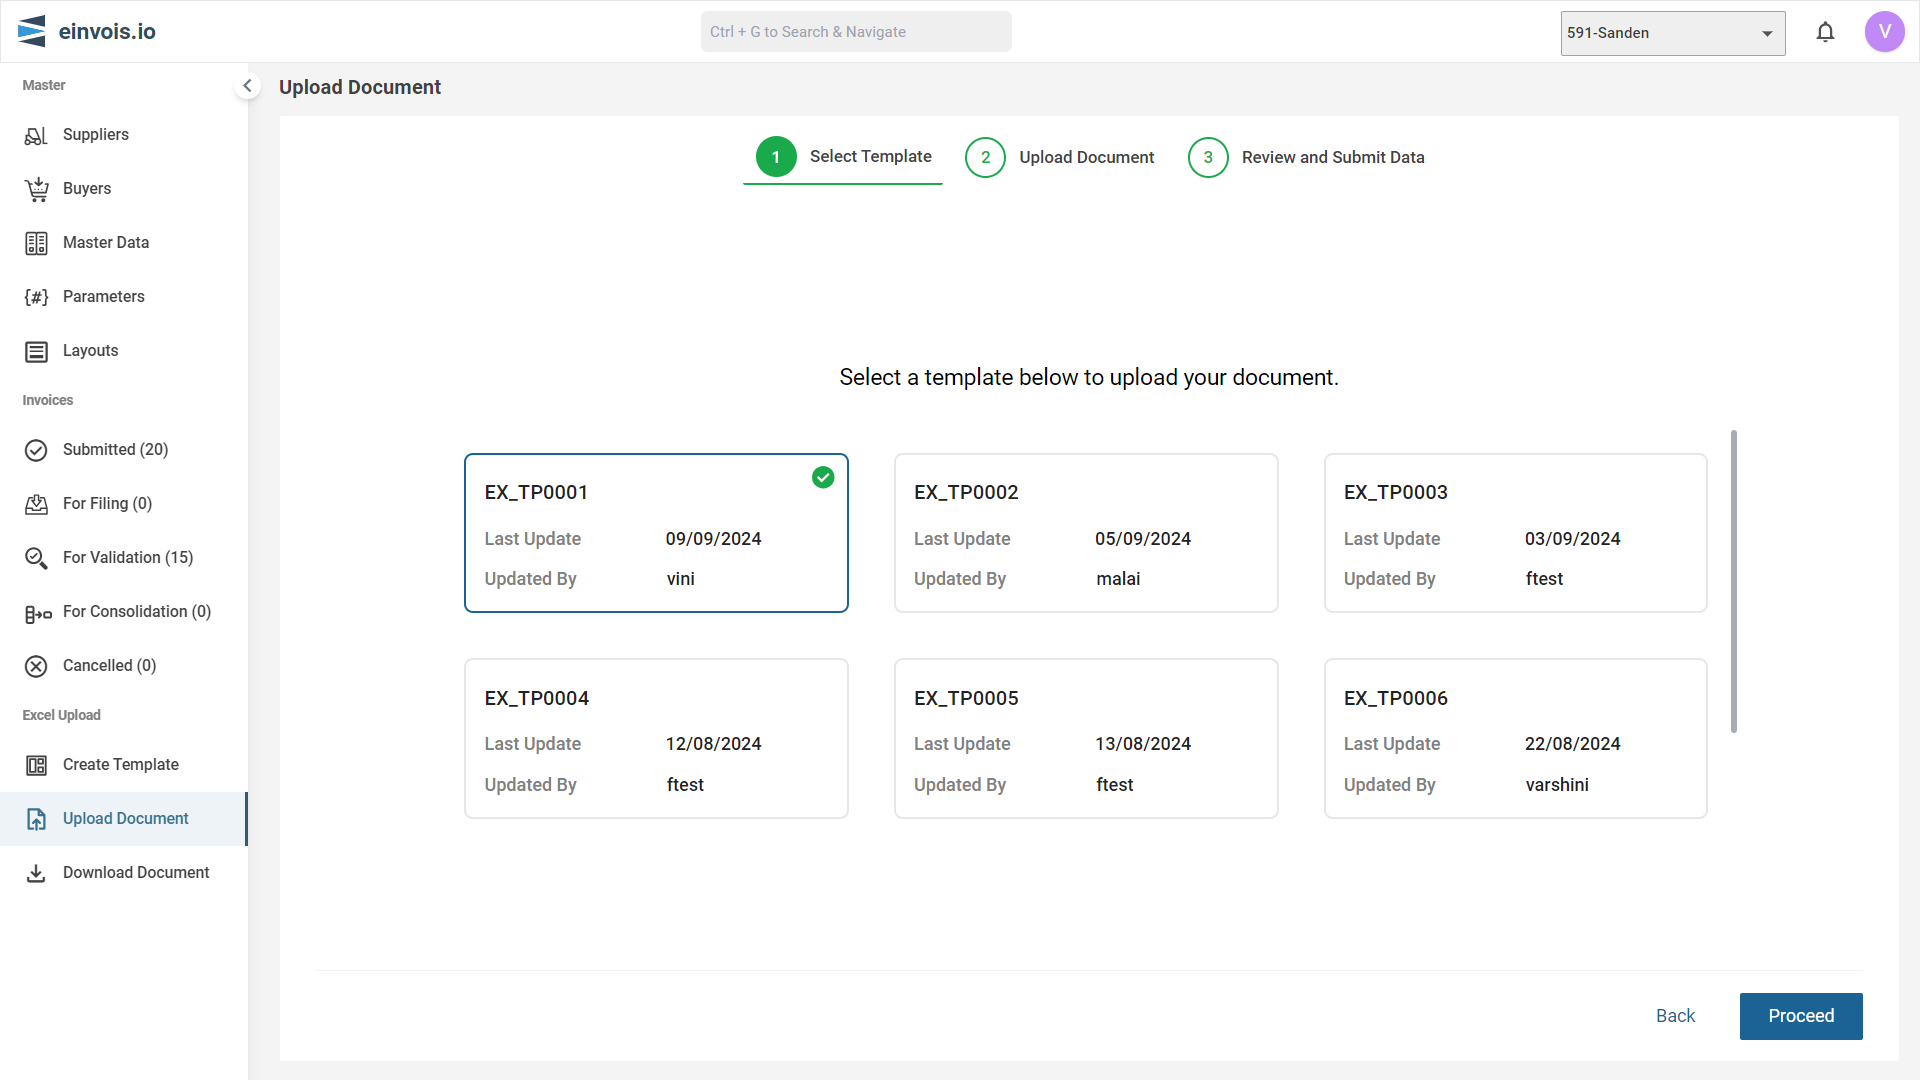
Select Template
This is the initial step where you choose a predefined template for the document you are uploading.
Upload Document
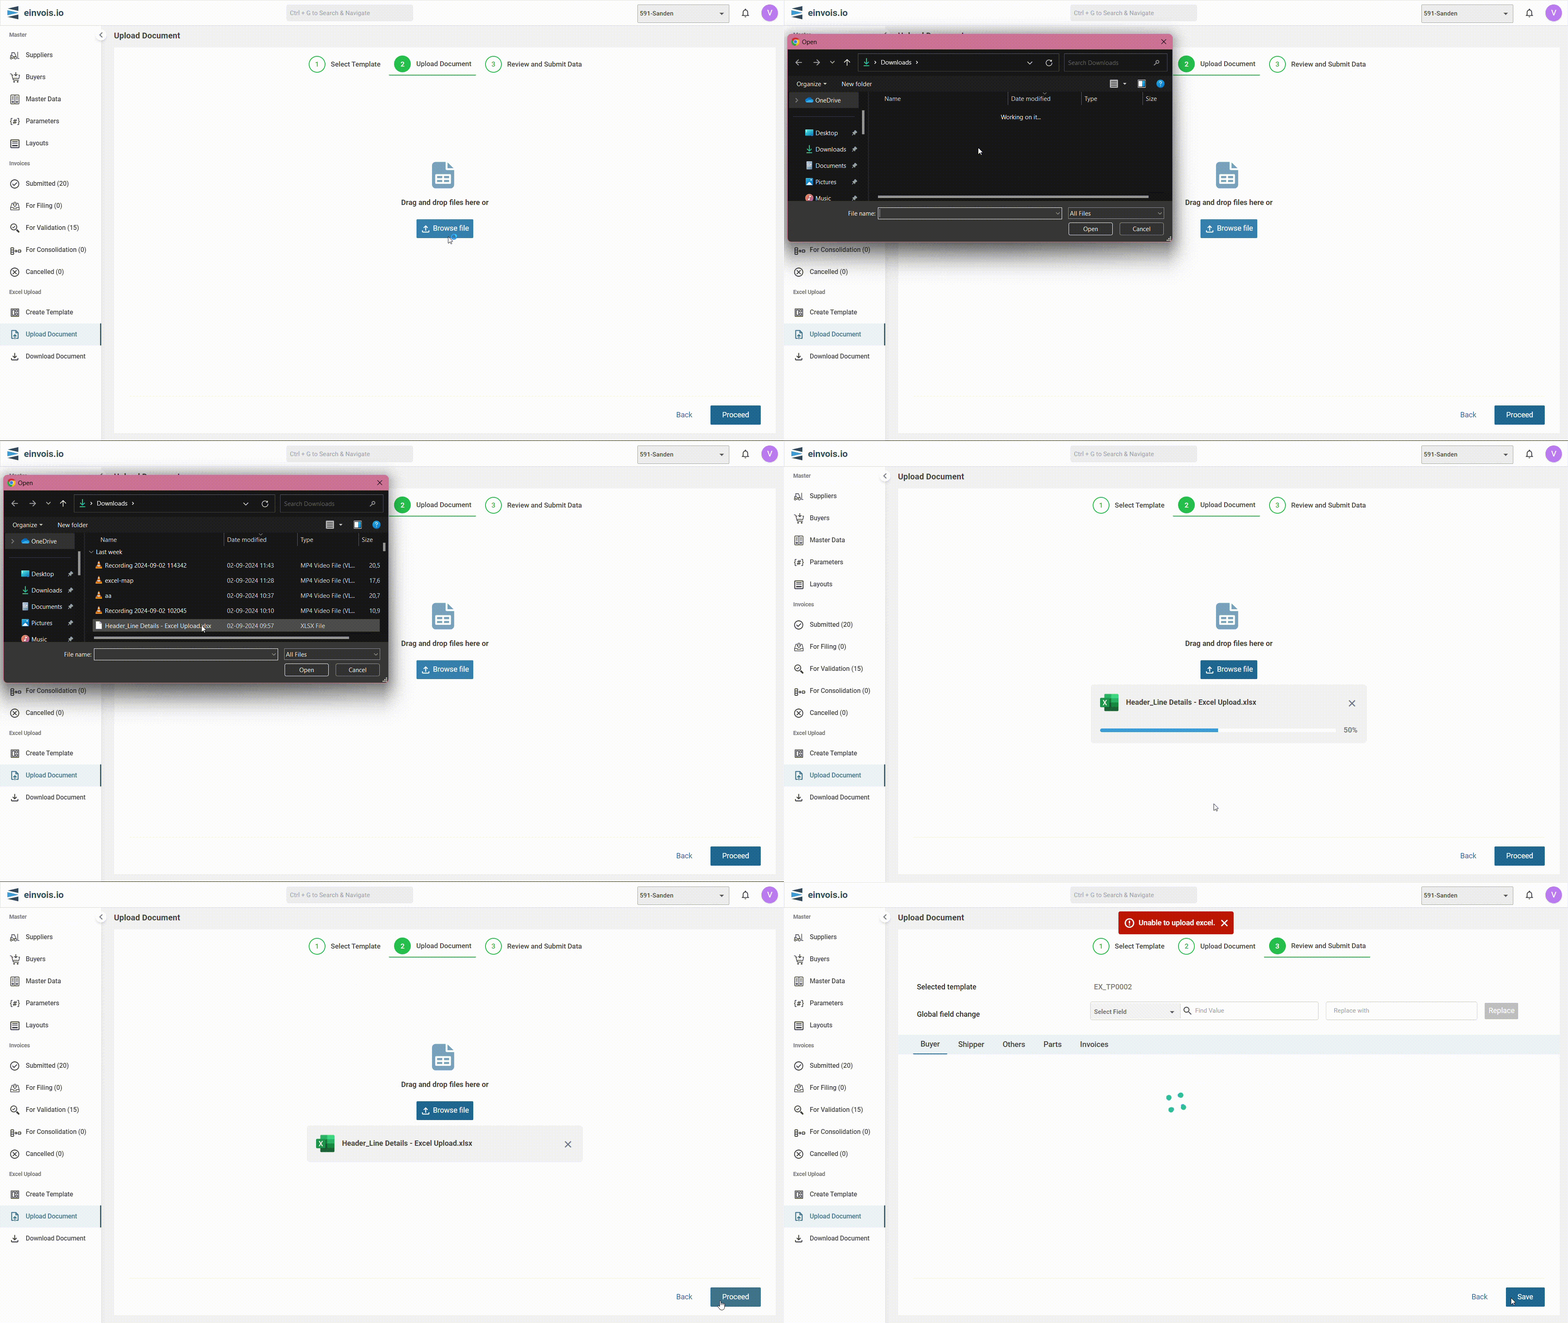
Action:
The user uploads the Excel sheet that contains the data.
Outcome:
If the Excel sheet is error-free: The document will be submitted successfully without any further action required.
If the Excel sheet contains errors: The document will not be submitted. The user will be notified of the errors and must proceed to the next step to resolve them.
Review and Submit Data Screen
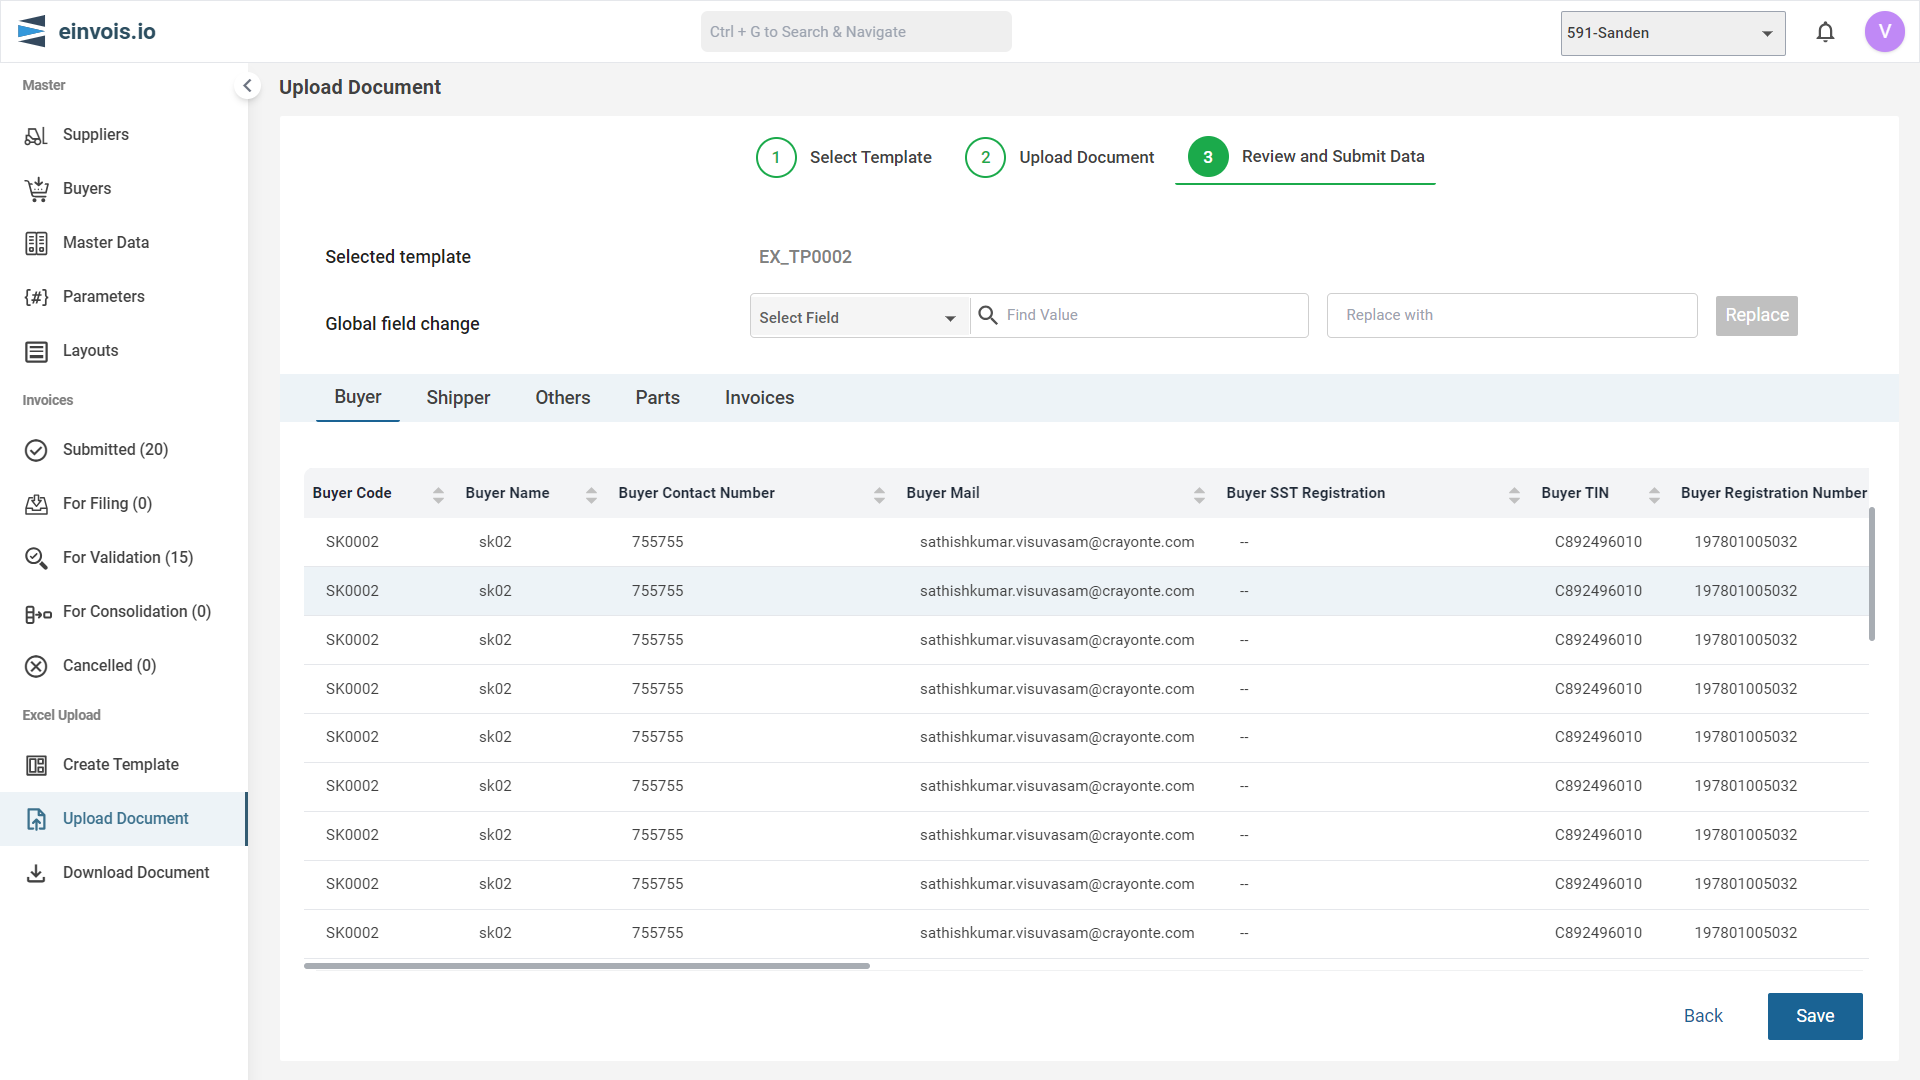
Global Field Change
Select Field: Allows you to choose a specific field from the uploaded document to change globally across all entries.
Replace With: This option lets you enter a new value to replace the selected field's value across all relevant entries.
Replace: After selecting a field and entering a new value, clicking this button will apply the changes globally.
Unmapped Indications & Error Indication
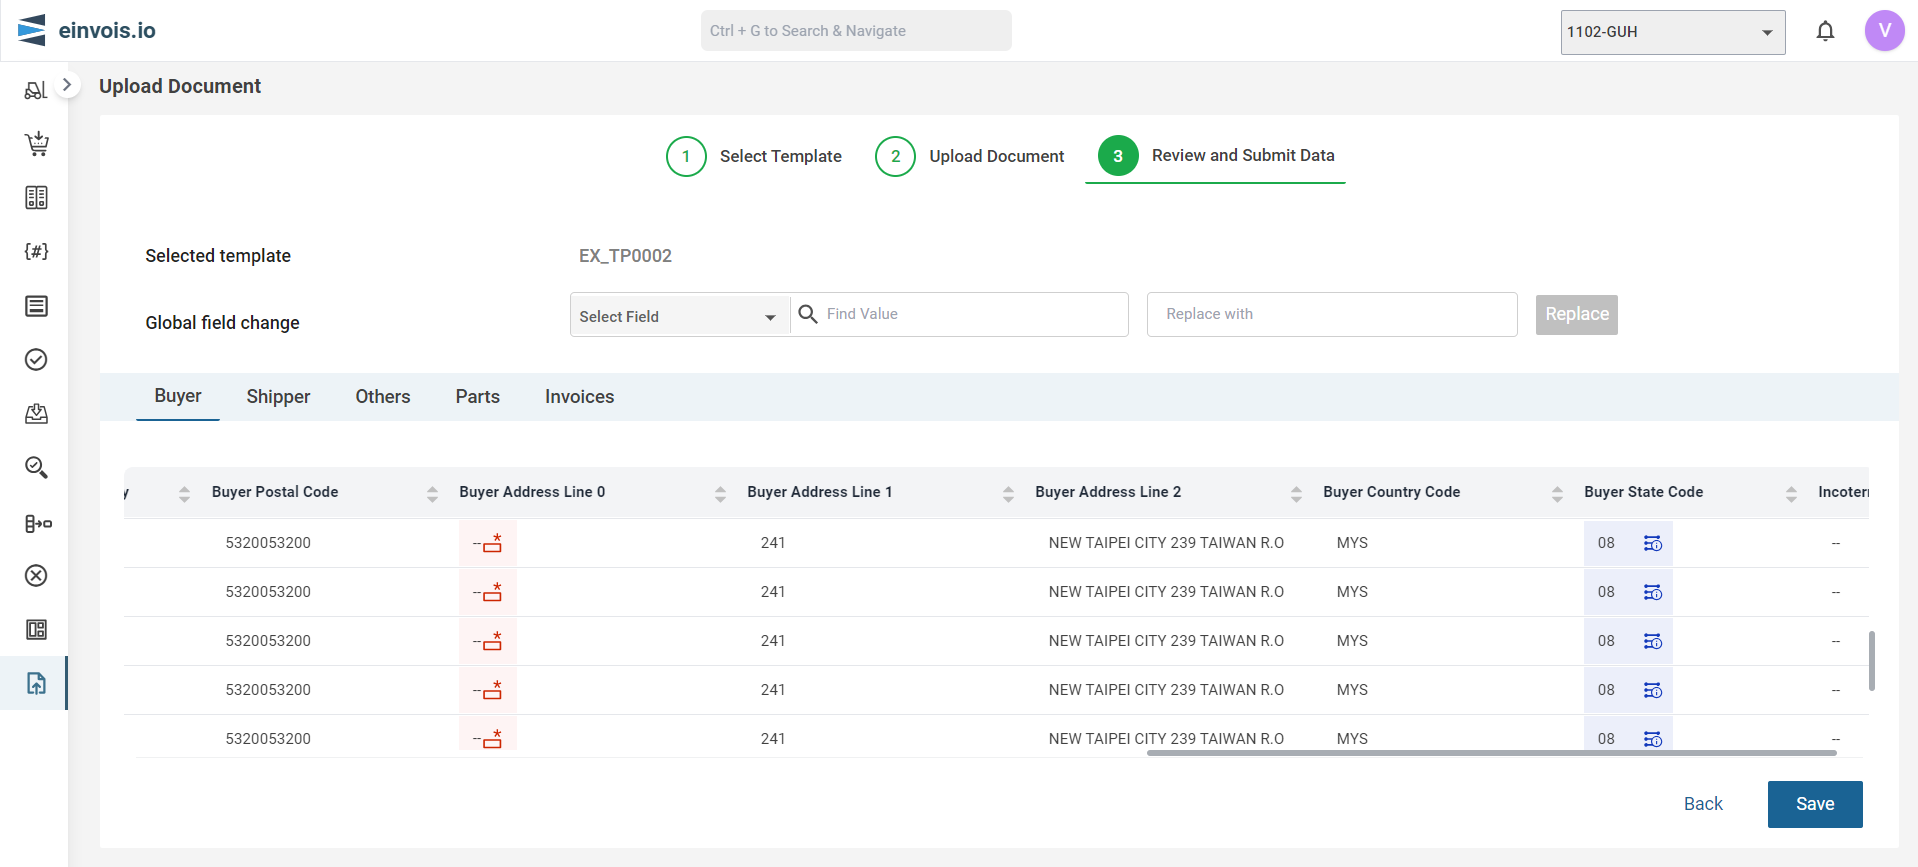
Unmapped Indications
The fields marked with a blue icon indicate unmapped fields. This means that the data in these fields is not mapped correctly in the system.
Users will need to manually map these fields.
Error Indication:
Red Highlighting: If any field is empty, it is considered an error and will be highlighted in red.
Error Icons: An error icon appears next to the field, indicating that there is an issue with that particular entry. This helps the user quickly identify where corrections are needed.
Manual Correction:
Users can manually edit the fields that are highlighted.
This allows them to correct any errors or fill in missing information directly within the interface.
Saving Changes:
Once all errors have been addressed, the user can click the "Save" button to save the corrected data. If the errors are resolved successfully, the data will be ready for final submission.
Download Document
This page enables you to download both successfully submitted invoices and those with errors identified during LHDN validation.
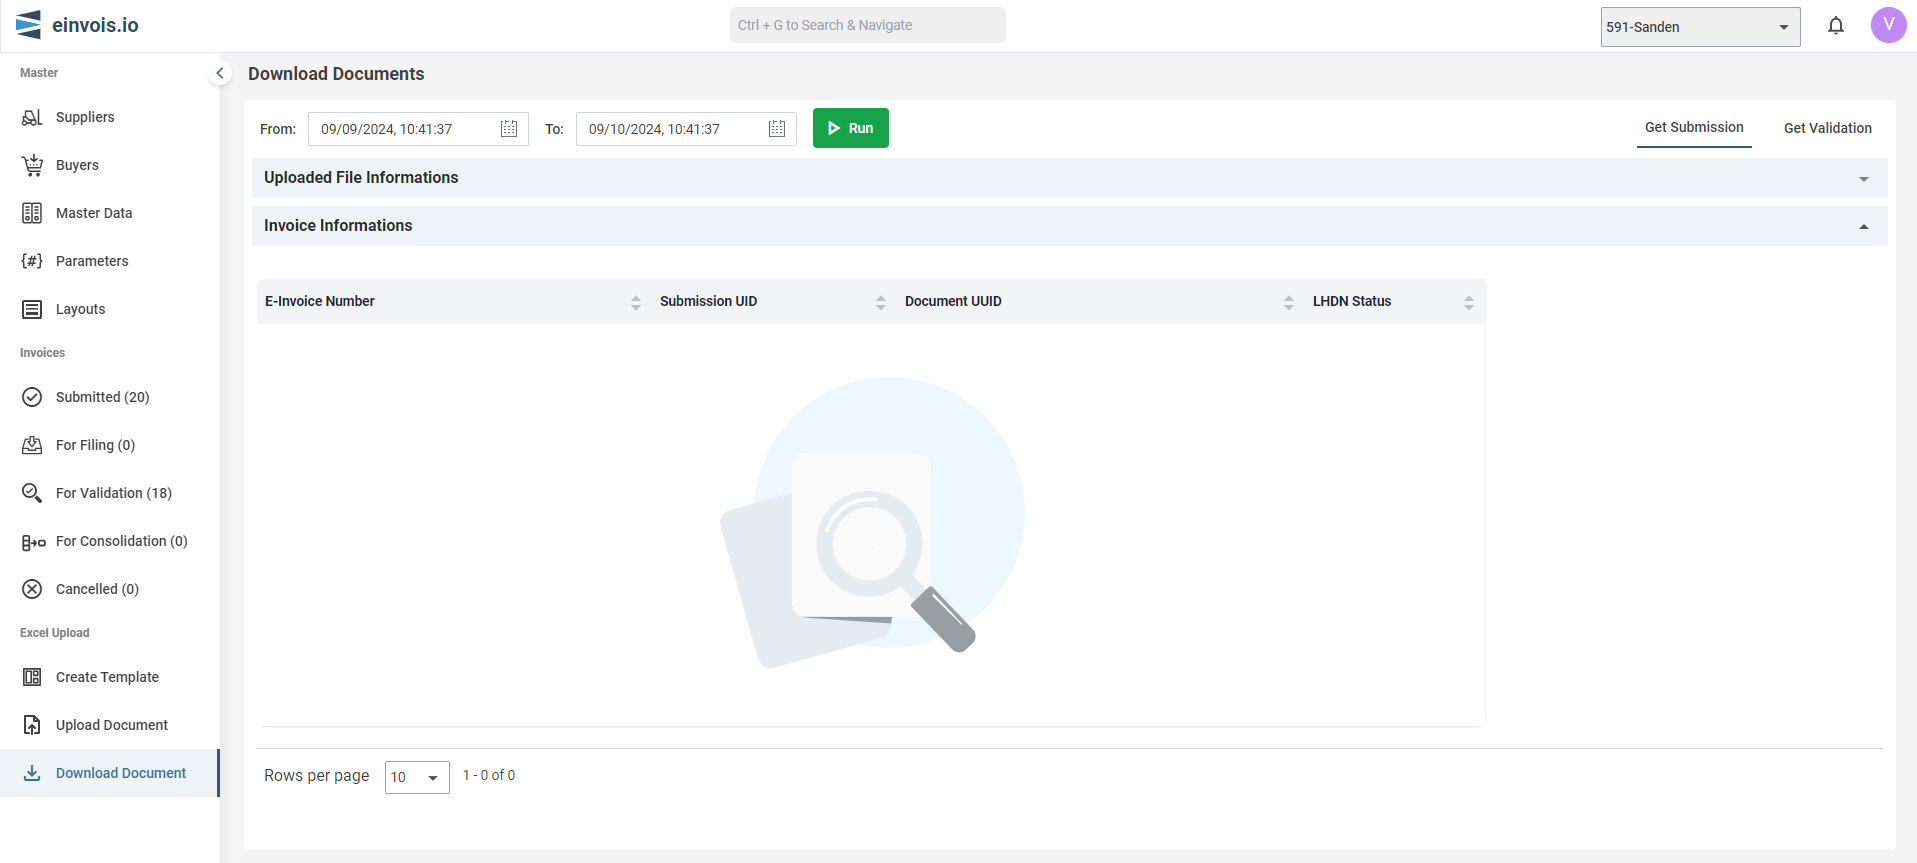
1. Get Submission Section:
If an invoice is successfully submitted, you can download it from the Get Submission section.
2. Get Validation Section:
If the invoice contains errors as identified during LHDN validation, you can download it from the Get Validation section.
Example Process:
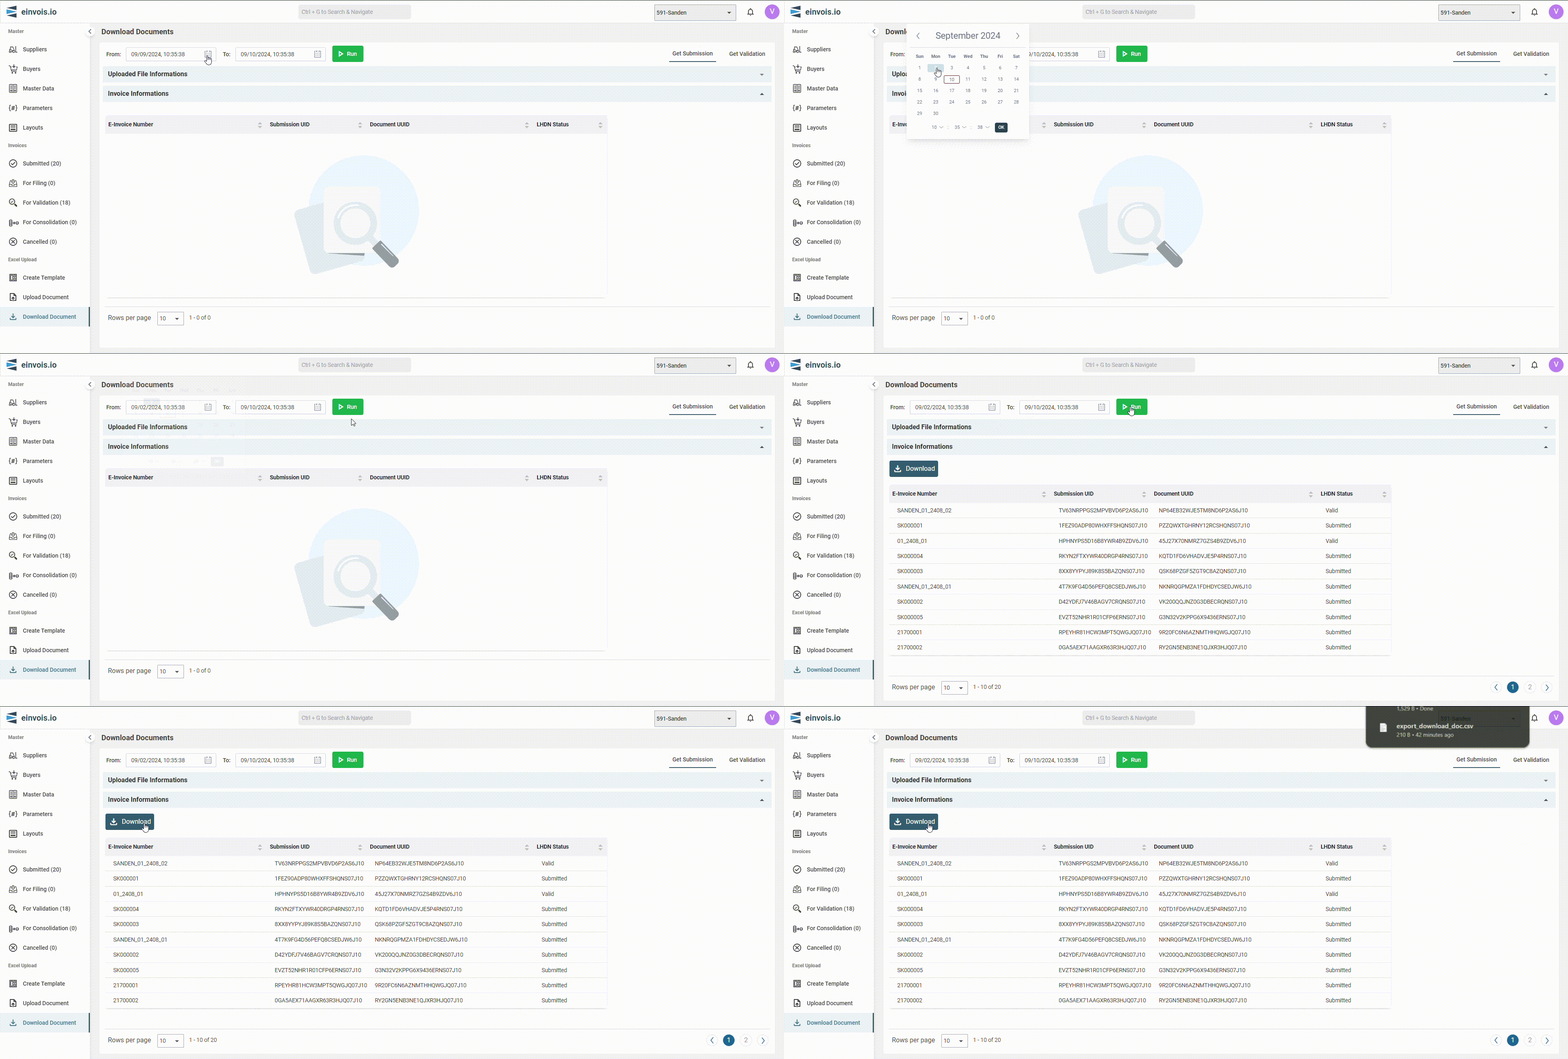
Step 1:
Select the date range.
Step 2:
Click the Run button to display the invoices.
Step 3:
After viewing the results, users can click Download to save the invoice records to their local system.